RSS Feed

Category Archives: Cricut Cartridge: Plantain Cricut Cartridge

Not Xyron but Should Be Blog Hop

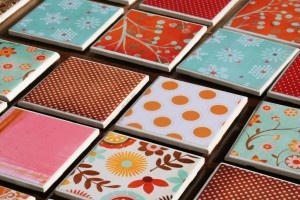
Happy Hump Day!  Xyron is hosting a “Not Xyron, but Should Be” Blog Hop this week.  The idea of this blog hop was take craft projects posted on Pinterest where Xyron products could be the star, but was not and make Xyron a star with our own spin on the project.  I chose coasters!

Pinterest Inspired Project

480d99d620aefe2498ff2921dd4d2757

It wasn’t a huge stretch for me since I had some extra limbs laying around from a recent tree removal that I have been wanting to slice up and turn into coasters AND that is exactly what I did!

DIY Coasters w tag

It was so simple to make by having my Xyron 5 inch Creative Station w Laminate/Permanent Adhesive and Xyron 3 inch Sticker Maker at arms reach!

DIY CoastersHere is how I did it (full supply list provided at the end of this post):

Measure the wood slices and make templates according to the sizes you need (I used my Cricut Expressions and cartridge Plaintain School Book Circle cut).  Using cork, burlap, and linen trace and cut out circles.

XyronCoasters1Once all circles are cut, run each though the Xryon 3 inch Sticker Maker, burnish, peel and stick on top of the wood slices.  Yes! It is that easy! Now you could just stop there, but why . . .?

Xyroncoasters2Using some favorite scrapbooking paper, punches, ink  and stamps and glue to create a fun embellishment for each coaster. I happened to use American Crafts 6×6 Neapolitan paper pad, cut out the mason jars and punched some coordinating circles, inked the edges and uses sentiment stamps from Joy’s Life – Everyday Occasions stamp set.

Xyroncoaster3Now for the icing on the cake! Take the paper embellishment and run it through Xyron’s 5 inch Creative Station using the Laminate/Permanent Adhesive cartridge.

DSC_7710

Burnish,free cut the embellishment, peel off the backing and stick!

Xyroncoaster4

This will allow each to stick to the coaster while protecting the paper embellishment from the job hazards of coasters!

DSC_7716

Genius right?  Not really, but I think it is really cool that Xryon makes products like the Laminating/Permanent Adhesive or my cute coaster embellishments would be soggy before my first refreshing sip.

Head over and check out the other amazing projects they are cooking up along this blog hop HERE!

Supply List:

Linking Up To:

Everyday is an Occasion – Sunday Funday


Advertisement

8th Fantabulous Cricut Crawl and Giveaway – Back to School!

 Hey there and welcome to the EIGHTH Fantabulous Cricut Crawl, Fantabulous Cricut’s version of a Blog Hop! If you’ve come from visiting Amy L. over at The Red Headed Crafter, you’re in the right place! If you’ve just happened across my blog and would like to play along with our Fantabulous Cricut Crawl, start HERE.
                                                                                                                                                                                                                                                                                            It is already that time of the year and we are all getting ready for BACK TO SCHOOL! Each talented Design Team member will be featuring an original BACK TO SCHOOL Project that includes a SCHOOL RELATED  Item, such as crayons, rulers, pencils, book, school bus, etc. along with at least ONE Cricut Cut.  There will be PRIZES along the way at our DT members’ blogs, AND there will be a Grand Prize up for grabs at FCCB for one participant that submits a “Back to School” project at FCCB! Now how is that for clearing up the case of the “Monday’s”!
                                                                                                                                                                                                                                                              Before I get into all the details and recipe of the project I want to let you know that I am thrilled to be able to OFFER A FUN GIVEAWAY from Scrapinkris’s Esty Store. You will get to personally pick out FOUR of your favorite crinkle ribbon colors. I will be announcing the winner on Friday.  All you will need to do is leave a comment on what is your favorite Cricut Cartridge and/or crafting supply.  Please be sure to include a way for me to contact you!
                                                                                                                                                                                                                                                                                            For my project my four-year old help pick out the inspiration of a bird house for her teacher that she will have this year. I kind of pulled out the kitchen sink of crafting supplies to do this project including recruiting the hub’s bandsaw to cut the pencils and rulers for the roof top.  I used Mod Podge for adhering the paper to the bird house and had some fun with my NEW Cricut Catridge, Doodle Charms! NOW I know why all the fuss over that cartridge and am kicking myself for not getting it sooner!
                                                                                                                                                                                                                                                                              Next up is the fantabulous Cicily over at Pink Dalmations Scrapbooker!  What a treat she has in store for you AND DON’T FORGET  to get in the game and link up your project to FCCB’s Fantabulous Cricut Crawl post to be entered into the contest!
                                                                                                                                                                                                                                                                                                                                                                                                       Thanks for sharing a piece of “fantabulous Cricut Crawl” pie with me!
                                                                                                                                                                                                                                              Project Recipe:
Cricut Cartridge – Create a Critter (owl cut at 2 inches) Doodle Charms (Apples cut at 3/4, 1/2 inches) Platin Schoolbook (rectangle for blackboard cut at 1 1/4 inches)
Paper- Recollections Solids and Brights and Creative Imaginations Studio 101 (for designer paper)
Punch- EK Success
Sentiment – My Pink Stamper: School Days
Stamp Ink – Close to My Heart: White Daisie and Topiary (for edging)
Stickles
Glossy Accents
Uibal Signo White gel pen (for stitching)
Mod Podge
Toothpick
No. 2 Pencils
Wooden Rulers
Wood Bird House (Michale’s)
Hot Glue
Happy Crawling!
Also Linking Up To:
http://lexiscreations.blogspot.com/
http://www.paperissues.blogspot.com/
http://heather-bittenbythebug2.blogspot.com/
http://cropstop.blogspot.com/
http://myshericrafts.blogspot.ca/
http://www.exploringcricut.blogspot.com/

Life’s a Party!

I have a friend that called me a few weeks ago to see if I would make some stuff for a baby shower she was throwing.  It was for a boy and it needed to be football themed.  How fun!  I think I have said this before, being a mom of two little girls, I jump at any chance to make boy stuff!

She wanted a football themed diaper cake inspired center pieces, thank you tags for the favors with a little referee that said, “Thank you for Taking the Time Out to Celebrate”, and a banner with the little guy’s name on it.

This is what I came up with!

Diaper Cake Inspired Center Piece:

Recipe: Cricut Cart was Life’s a Party  football image cut at 2.5 inches for base football and 2.75 for shadow. I used Swiss Dots for embossing.  For the diaper cake center piece, I used zip ties and rolled 3 size 2 diapers and fastened zip ties around the middle of each and then used a large zip tie and attached all three together in a triangle set up and wrapped about 11 inches of ribbon around the middle to cover the zip tie and fastened ends together with Zot Dots and then attached the football embellishment with a large Pop Dot a the seam of the ribbon.

Thank You Gift Tags:

Recipe: Cricut Cart was Mini Monogram both circle and scallop were cut at 4 inches.  I used Microsoft Publisher and made the image.  I found a pregnant stick figure and decided to make a referee with a bump.  I needed to have it be solid black so i could color lines of white for the referee shirt.  It was easier finding that image than black and white cardstock that I was going to use for the original concept of using the pregnant silhouette image from Life’s a Party Cricut Cart.  I used my white gel pen for the stripes and embossed the scallop layer with Swiss Dots folder for my Cuttlebug. I punched a hole at the top of each gift tag and ran ribbon through it so she can attach these to the favors. NOTE:  I printed out the images and then used the “CENTER” feature on my Ciruct.  It was a bit tricky at first, but I figured it out thanks to a tutorial video I found via My Pink Stamper.  I view a few other videos at first that I “goggled” and they were not cutting the mustard on really QUICKLY breaking down how to do it.

Banner (LOVE DOING BANNERS):

Recipe: Cricut Cartridge Life’s a Party onsie cut at 4 .75.  I used Design Studio ( I can’t seem to get Cricut Craftroom to successfully update, so until I have some leisure time to call PC I am using DS).  I used the “Hide” feature for the duck and so I have just the onsie.  I then cut the base of the banner out of chipboard and the same exact image for the white layer I embossed with Swiss Dots.  I then used the layer feature on my Circut and cut the blue and brown polka-dot.  For the lettering I used Schoolbook Plantain at “REAL DIAL” size at  inches and then embossed with Swiss Dots Cuttlebug folder.  I then punched two holes, using my Crop-A-Dial at the top of the onsie on only the chipboard, then ran the baker’s twine I got from My Craft Spot.

For the little footballs that are in the center of the ribbon bunting, I used the same football image I used for the diaper cake center pieces cut at 1 inch.

For the bunting  I used 7 layers of material cut at 5 inches each and then trimmed when each was completed.  I layered the tulle and ribbon tieing them directly to the baker’s twine (each tied on top of each other in a diagonal way so the material fanned out with each layer). I used a glue gun to attach the football.  The banner measured about 6-feet

I had a ton of fun doing this project and it only took about 9 hours to plan, prep and complete. Not bad for just a few hours for a few days this week.

Thanks for coming and sharing a piece of “life’s a party” pie with me!

My Pink Stamper’s Pink-alicious Blog Hop Challenge!

I was not sure I was going to be able to participate in My Pink Stamper’s Blog Hop Challenge this go-around since I am still nursing the war wounds of having the stomach flu for the second time in 6 -weeks!  Yikes!

But today, I wanted to take it easy and decided to work on my Valentine’s Day project stuff and came up with this card times four for some special moms I am getting to know in my daughter’s co-op preschool using the challenge details of using multiple My Pink Stamper Stamps, a Cricut cut out, the color pink ribbon, a circle and the color red.

All these moms share something special in common!  They are expecting!  There are 19 of us and four are expecting!  I decided to do a semi-Valentine meets word collage for a perggers mommy card.  I am doing something else for all those that decided not to drink the water, but I wanted to do something a little more special for these ladies.

Some have had horrible morning sickness, some have worries from what they experienced in their last pregnancies and ALL already have small children to tend to.  Since I could write a book about all the above, I have a special place in my heart for these ladies and if and when I can get a chance to show them I care, I will . . . hence the card.

Thanks for sharing a piece of “remembering what it was like being pregnant and showing a little extra love to those that are on Valentine’s Day” pie with me.

This slideshow requires JavaScript.

Recipe:

Cricut Cartridges:

Everyday Pop Up – Maternity cut at 4 inches

Plantin SchoolBook – Heart cut at 3 1/4 inches

Cuttlebug:

Swiss Dots

Swirls

Paper:

Recollections – Red, pastel pink, white, black

Ribbon:  Celebrate it 1/8 inch pink satin

Stamps: My Pink Stamper’s: Spectacular Sayings, Itty-Bitty-licious, Everyday Life, Christmas Wishes

Ink: Stampin’ Up Classic Black and Close to my HeartHolidayRed

Gem: for the ring bling and for my circle

Stickles -Xmas Red for the shoes!

Holy Composition Book Batman!

Today is my neighbor’s 14-year old boy’s birthday.  I made him this composition book.  It was fun to do another boy project!


Used the Ranger Peal Powder after I stamped and embossed "blast"


Recipe:

Cricut Cartridge: Plantain  School Book  “Blast” set at 4 1/4 inches

Paper:

  • Williams Sonoma Comic Book freebie!
  • Recollections: Mat blue (for spine- cut to 3 inches long) and Bright Yellow cardstock

Cuttlebug: Spots and Dots

Ranger Peal Powder – From the Cafe Collection – orange color

Stamps: My Pink Stamper – Font-abulous (LOVE THIS STAMP SET!)

Ink: Stampin’ Up – Classic Black

“Holy Cricut Batman!” Another Birthday Party and My Cricut!


Cake/ Cupcake toppers

I have a dear friend that asked me to do the decorations for her son’s 6th birthday party, using the Marvel Super Hero Comic theme.  Since I have two girls I could not wait to get my hands on a “total boy” birthday project.  

I made cake/cupcake toppers, a 16 foot banner, and hanging “pom-poms”.

For the base of the banner, my friend and I snagged some free promotional comic books from Williams Sonoma.  It was a bit tricky cutting the banners out on the comic book paper, but after a few run throughs, I manged to find the sweet spot of my bug (speed slow, low pressure, and light blade).  I supported the comic paper with a heavy-duty card stock cut at the exact demention.

I did most of the work in Design Studio and used Glossy accents on the “words and number”

This project had a lot of “devil” “vilians” in the details, but I think it paid off in the end.

Pom-Poms

Below I listed a very loose recipe and if you would like more detail, feel free to contact me.  You can find my contact information on my “ABOUT” page.

Thank you for coming and enjoying a “Holy Piece of Life’s Pie Batman” with me! 🙂

Recipe:

Cricut Cartridges:

  • Celebrations
  • Plaintain School Book

Cuttlebug Folders:

  • Squares
  • Circles
  • Stripes

Paper:

  • Comic book
  • Red, black and yellow card stock from Recollections

Glossy Accents (used on the words and number)

Pop Dots

Glitter Pipe cleaners Cut to about 2-2.5 inches in sets of three to make the star

Glitter Pom Poms

Ribbon:

  • Celebrations 1 inch red (roughly 6 yards)
  • Celebrations 1/8 inch red

Wilton Lollipop sticks 4 inch

Tissue Paper (6 sheets layered and cut down in half)

Staples

4th of July Party on a Budget!

I love to throw parties and when ever I can I will, but no matter how you slice it or dice it, parties can get a little out of hand in the price department.  I just hosted a 4th of July party where I had about 20 in attendance.  I made all my decorations with mostly what I had on hand already in my craft room and shopped the ads for the food.   We kept it simple with burgers and dogs.  For cocktails I found a really good pre-made margarita mix at Costco for $11 a bottle (Kirkland brand).  A friend over asked if I had Grand Marne on hand and she added a shot of that to each “rita” and WOW were they good!


I put American Flags that I got on clearance last year in this jar and added a tag I made from my Cricut Celebrations cartridge (3 inches). Paper was from Die Cuts with A View Summer Stacker


Label was made from Cricut Storybook Cartridge (2 inches)

I wrapped these tin pails I had from a previous party with some patriotic material I found at Jo-Ann’s at 75% off.  I also used this same material for table runners.

I made these stars from Plantain Cricut cartridge the star is 2 .5 inches and the layer star is 2 inches.  I added little “pom-poms” to the center and attached with hot glue to 2 inch white tin pails I had from a previous party.

I made the Pom-Pom by using a method I found online.  The only thing I did do, is I layered different colored paper to get the multi-colored effect.   They were so easy to make.  I did use zip ties instead of stapling the center.  That seemed to work amazing!

For my tables I wrapped the kiddie tables in brown butcher paper and then wrapped the star garland on both ends.  I cut the table runner to fit and taped down with painters tape.

Card Making and Cooking; When Two Perfect Worlds Collide!

This week is VBS for my three-year old! While volunteering in the classrooms,  I volunteered to bring a dish for one of the nights for the volunteers.  Last night was my night and I made a recipe that I more or less made up with a little help from our local Trader Joe’s. 

Since the dish would appear non- descript, I decided to make a fun “calling card” for the dish.  Apparently the dish was a huge hit, and was gobbled up in no time flat.  So if you are looking for a fun and yummy dish to take to your next potluck, here is an idea!


Chili Corndog Bake

Ingredients:

  • 1 Box of cornbread mix (follow the directions of the box to make)
  • 2 packages of hotdogs (16 dogs) * I used turkey dogs
  • 1 cups of shredded mild cheddar cheese
  • 2 cups of mozzarella cheese.  You can substitute  jack cheese.  I like mine super cheesy that melts smooth and creamy so I use mozzarella.
  • 3 cans of chili with beans of your choice. * I used turkey chili with beans.
  • Diced red onions (optional)
  • Diced jalapeno for garnish (optional)


Directions:

  • Pre-heat oven to 350 degrees
  • Grease a large casserole dish or aluminum throw-away bake and serve dish with oil spray.
  • Empty contents of chili cans into the dish.
  • Cut hot dogs in threes length wise and dice into small pieces and place in dish.
  • Add 2 cups of shredded mozzarella or  jack cheese to dish.
  • Combine all ingredients and spread evenly.
  • Sprinkle top with 1 1/2 cup of shredded mild cheddar cheese.
  • Follow the directions on cornbread box and make cornbread in a seperate bowl.
  • Spread cornbread evenly onto chili mixture.
  • Place in oven and bake for 45-55 minutes or until a toothpick comes clean.


Card: 

  • Base: I cut a piece of white cardstock down to 12 inches wide and 8 inches long and scored it to fold in half (new measurements 6×4)
  • Paper: I cut down a piece of design paper from Die Cuts with a View, Summer Stacker to 6×2 2 1/2.
  • Cricut cartridges: Simply Charmed (Shadow setting on hotdog and hot dog bun and mustard set at 3 inches)
  • Cricut cartridges: Schoolbooks Plantain.  Typed in the words “chili corndog bake” at 1 inch setting.
  • Stamps: Peachy Keen Big Eyes Boy
  • Stamp Ink: Stampin’ Up Classic Black
  • Ribbon: Used some scrap I had.
  • I attached the hot dog with dimensional.


Life’s Crafting A Gift that Will Keep them Using Their Heads!


Bow Storage Wall Hanging


I have two little girls, so in my house, so you can only imagine that I am over run with bows  – LOTS OF BOWS!  I had a dear friend give me one of my most prized possessions in the hair department when it comes to my girls.  It was a bow holder made out of a picture frame.  She made it at a “Girl’s Night Out” crafting event and gave it to me as a gift. 

I figured out how to make it myself and I now too have been making them for girlfriends as gifts.  They are a great birthday gift for the toddler that has everything in the scope of toys and clothes or for a babysitter.  Just add a few bows and maybe even a homemade tutu or one that you can pick up at Costco and you have a gift fit for any princess.

The whole thing costs about $7 dollars to make if you do it right.  I get the picture frame at Michael’s and use the 40% coupon you can find online each week.  I head to a fabric store and pick out  cute scrap pieces they sale (which are the perfect size for this project.)  As for the ribbon I am always on the look out for the $1 spools and I just stock up and I coordinate my scrap material finds to the ribbon I have on hand.

Supplies Needed:

  • Scissors
  • Hot Glue Gun
  • Assorted Ribbon – You will want to have 5 rows.
  • Material size 12×12
  • Picture Frame that can hold a matted 8×10 picture


Instructions:

First you place the glass on the material face down and wrap the material around the glass securing it as you would with tape with hot glue.

Then cut and arrange ribbon using a layering effect  on at least one of the rows.

Wrap and secure the ribbon around the now covered glass  with hot glue. Make sure it is  moderately tight where there  is enough give to be able to clip a bow to it.

Place the finish insert back into the frame.


Add a hanging bow to the back clasp

Completion!


The whole project took about 20-30 minutes to do depending on how settled I was on the ribbon choices.