RSS Feed

Category Archives: Samantha Walker Designs

Gettin’ Hoppy with an Easy Easter Banner

Up over at Samantha Walker, you can see how I made this cute bunny banner using her Samantha Walker Bunny cut file just in time to greet Mr. Cottontail!

Hoppy Easter Banner Project 1

This banner was super easy to make thanks to Pick Your Plum wooden pennants, DCWV Linen Sheets, and only one cut used as a stencil! Having my Xyron Creative Station handy just added to the laziness  ease of the project.

DSC_7757

I had the help of Hemptique Baker’s Twine to add a little extra bounce in the bunny tail and to be the support of project for holding together the pennants.

Samantha Walker Easter Banner 5

I addes some buttons, faux stitching and fabric letters (yes you see them on all my projects! I just love them).

DSC_7756

This project was not only super simple and easy to do, but there is something therapeutic about just simply tracing and cutting and with this bunny cut from Samantha Walker, it could not have been any easier. Full tutorial and supply list is up over on Samantha Walker’s Blog!

Supply List: 

  • Bunny Cut form Samantha Walker
  • White Cardstock (Recollections)
  • Laser Cut Wooden Pennants (Pick Your Plum)
  • Linen Fabric Sheets (DCWV)
  • Cuttlebug Embosser and Swiss Dot Embossing Folder
  • Baker’s Twine (Hemptique)
  • Scrapbook Paper (Recollections)
  • Fabric Letters
  • Buttons
  • Stamp Ink (Close to My Heart/Slate)
  • Xyron Mega Runner
  • Xyron 5 inch Creative Station
  • White Gel Pen (Uniball)
  • Hot glue
  • Scissors
  • Pencil


Advertisement

It is so fun to be ONE!

Image-1 (1)

Woot! Woot! It is Friday and we are in full P-A-R-T-Y mode!

If you are hopping along the “blogiversary ” going on over at Everyday is an Occasion you are in the right place! If you are here by chance, you are in for a treat!  Jill from Every Day is an Occasion is celebrating her one year blogiversary! Today you will be hopping from blog to blog gathering birthday inspiration.  AND she has some amazing CHA crafting swag she scored over this summer for her goodie bag giveaway!

My birthday inspiration came from the delights of one of my many weekly Target runs.  Yes, I said Target!  I saw  a card in the stationary section that caught my eye and when I almost summoned up the courage to think I may buy it, I realized that I could so easily make this and save the million dollars $4.99 they wanted for it. Duh!!! Yes, sometimes I loose my mind and forget that I have a 300 square foot crafting island in my house.  I blame that moment of insanity on the blinding bright lights of Target and my kids nagging me to get over to the toy department so they can add to their already mile long Santa list.

So here is what I came up with!

DSC_7163

This is a Samantha Walker cut that can be found at the Silhouette Store.  It was super easy to put together and all I did was copy the base of the image and flip it and weld the two bases together to form a “fold” card.  If you need a good tutorial on welding with your Silhouette, click HERE.
I inked the edges and added some bling and buttons and had a lot of fun playing with the fun features of this card.  How cool is the “cone holder”? I added some baker’s twine and more bling and buttons to finish off the cone
DSC_7158
I added sentiments from the retired My Pink Stamper Collection under the scoop flaps for more sweet surprises.
icecream
This card was a lot of fun make and I know it will bring a smile to any birthday celebration!
Be sure not to forget to head over to the “Birthday Blog” and get yourself in the giveaway mix! 

Image-1 (2)

Now let’s keep the party hoppin’! 
Arin-https://apieceoflifespie.com/ (YOU ARE HERE)

Something Sweet and Dainty!

1010281_374154559373869_2102179449_nHead over to Jinger Adams today and check out the sweet and dainty project I made using her Sweet Tart Scrapbooking Collection!  This paper and accents are just the ticket for perfectly paper-crafted crafts.

DSC_6462 (1)

You can find her products at these online retailers!

HSNAmazonScrapbook.com

Wrangling Up Some Father’s Day Fun!

FCCB_DT_btn

Yay it is FCCB Monday! Today we are having a great challenge full of Father’s Day inspirations!  Head over and check out what the team has cooked up and LINK up a fun Father’s Day Project using at least ONE Cricut cut.   Here is what I came up with for my own dad using a 7 inch jar cut from Doodlecharms and the AMAZING paper line from Carta Bella designed by Samantha Walker – Giddy Up on a wooden plaque.

DSC_6858

I cut the picture via print and cut feature on my Silhouette and inked the edges. Using CTMH Slate and Chocolate ink, I inked the jar, wooden edges, and paper.  I wrapped the jar with Hemptique Hemp Cord and added button.  I also added a brad I found via Pick Your Plum and additional buttons.

DSC_6851

Layering this paper was so fun and the sticker sentiments are just a kick in the pants! I added some push pin embellishments I got from Pick Your Plum.

DSC_6854

This was a fun project to make and I know that my Daddio will love this!  Now be sure to head over to FCCB and join the party!

Thanks for sharing a piece of “getting my giddy up on” pie with me.

Linking Up To:

Crafting Desert Diva’s – Link It Up Party #8

Everyday is an Occasion – Sunday Funday

Samantha Walker Guest Designer Spot!

Samantha Walker

Hi all! Today I am beyond thrilled to share with you all that I have the amazing honor to be the guest designer over at Samantha Walker’s blog TODAY!  Yay!  Before your head over and check out my two 3D projects using her amazing Silhouette cuts and paper from Carta Bella called Paris Girl, check out this fun and sassy project I made using four sweet tea pot cuts from her Silhouette cut collection.  You can find these cuts HERE.  DSC_6544

All I did was pick up a 10 inch blank scallop MDF wall hanging from Michales and designed the cuts in Silhouette Design Studio.  I free handed making a 10 inch circle using the stock shapes and using the stock font, I wrote up the saying and the take the four tea pots, ungrouped each tea pot and only kept the layer with the flourish design.  Then lined them up and sized the tea pots down and group together and positioned under the saying.sw word

I cut it out on vinyl, burnished to the wall hanging with transferred tape and spray painted.  I allowed the paint to dry and and pulled off the vinyl.  Hit with the sander and to distress and called it done!

DSC_6545

This project is a bit of an inside joke around my house and the hubs and I have a good laugh when I coyly quote this to him when he asks how was my time with my girlfriends if I recently met up with them for a visit.  So, in the spirit of sassy fun, I decided to make this to hang in my craft room.

Now be sure to head over to Samantha Walker and check out the fun projects and video, yes I said video, I made for one of the projects!  YIKES! LOL!

Thanks for sharing a piece of “my sassy side” pie with me!

DIY Doll Wardrobe

Check out the video to see an up close and personal tour of these fun filled doll wardrobe.

Happy Sunday All!  I can’t believe NEXT Sunday will be Easter! Wow time is flying by and I guess it feels that way since I have been very busy in my craft room and in the hub’s workshop cookn’ up some fun playtime goodies for our two little girls.

ag

DSC_6101

A while ago we decided we needed to make something that would hold all the dolls and doll swag our little girls are starting to accumulate.  I wanted it to be interactive as well as organized storage.  The hubs and I sat down started to design a concept.  We came up with a design, made a blueprint and headed to the wood store.

DSC_6106

It has taken a few weekends to knock out these two pieces, but we had a blast doing it.  We still have a large drawer to make and that is soon to be in the mix of construction. DSC_6096

DSC_6110

I had a blast putting my Silhouette to work and cutting out vinyl and transferring it onto sections of these structures, spray painting and peeling off.  I found the cuts at the Silhouette store from Samantha Walker and Lori Whitlock.  DSC_6097


Thanks for sharing a piece of “love DIY” projects with the hubs!

Linking Up To:

Gotta Create – Wildly Original Linking Party

The Real Thing- Link Party
I Heart Naptime- Link Party

Old Friendships, Very Loved Projects and Doll House Party Invites!

DSC_5895

We all have that one friend that we have known longer than anyone.  One that you grow up with, the one that you have done some of the silliest and most outrageous things with.  Watched each other head off to college, get married, have kids,struggle, succeed and grow. The one friend that even after years of letting life get ahead of keeping in touch regularly, once you reunite, you pick up right back up with finishing each other’s thoughts in conversations and just know them to a level of almost being a part of your family.  I have that in a dear friend I have known for over twenty years and in the past couple years we have settled in life enough to keep up with each other more even though we live 7 hours apart.   I was thrilled to have the opportunity to make party invites for her brilliantly themed vintage doll house birthday party she is planning for her sweet 3 year-old little girl.

She and I share a love for vintage anything and if you throw in a french twist you have us hook, line and sinker.  So to me once she told me the theme, I knew exactly what I was going to create.  As many of you know, this year I am a  Guest Designer for Samantha Walker’s die cuts you can find over at the Silhouette Store.  I remembered seeing a house card when perusing her stuff and decided to go from there.  I did not use all of the cuts that came with the house since I had volume of invites to make, but I managed to improvise some of the layers and add embellishments to make this just be the sweetest 12 darn things I have made in a long time.  We all have those projects that just evolves into something near and dear to our creative heart.  Believe it our not, these were hard to part with, but seeing how thrilled my friend was with the end result, it was a joy to send them away.

DSC_5904

Here is how I did it: 

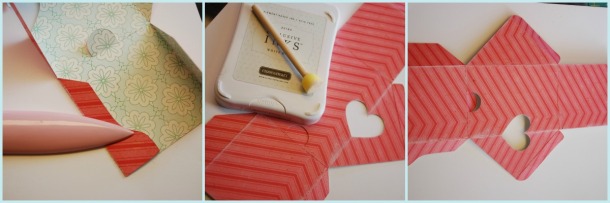
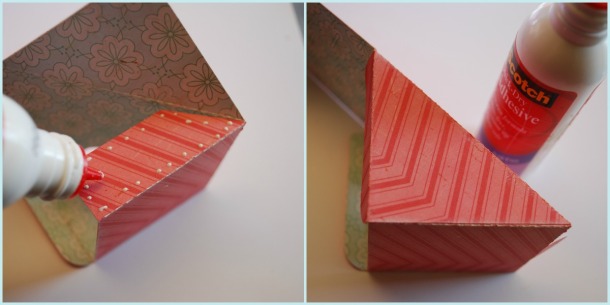
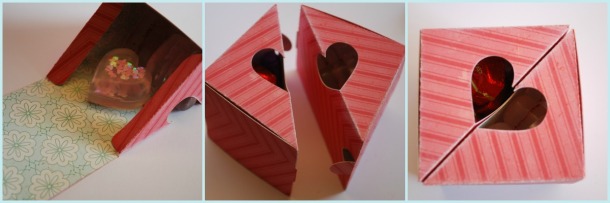
I bought the doll house via the Sillouhett Store and kept the size the same.  It fits beautifully in A2 envelopes!  I opened up several pages and began to ungrouping the piece together the pieces I wanted.  The base of the house I cut on white card stock and then cut another layer on double sided designer card stock from Crate called Little Bo Peep.  This worked out beautifully since I could cut down that house and flip the side that was the back of the house and use as another front layer.  I inked each layer with coordinating stamp ink (Close to My Heart Cotton Candy). I secured layer to base using my ATG.

DSC_5902

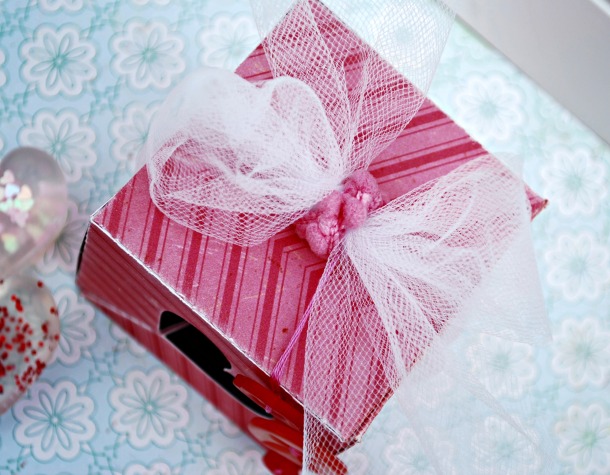
For the windows, eaves, flower box, bird and doors, I cut the shapes out from American Crafts 6×6 stacks I found at Target! I really wanted to translate this was a birthday party invite so I wanted the door to look decorated with birthday pennants and banners.  American Crafts sure delivered and to scale!  I inked layers with stamp ink (Close to my Heart Topiary, White Daisy, Cotton Candy and Stampin’ Up Pumpkin).  I secured with Scotch Quick Dry Adhesive and Pop Dots for those items that needed some dimension (bird, flower box, sentiment).

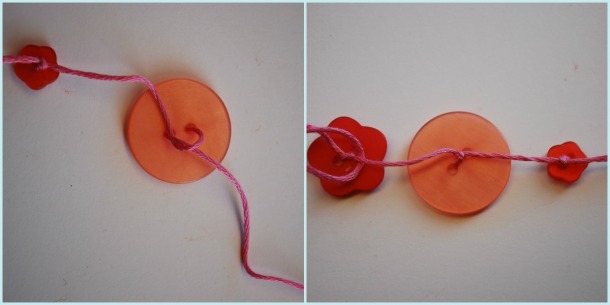
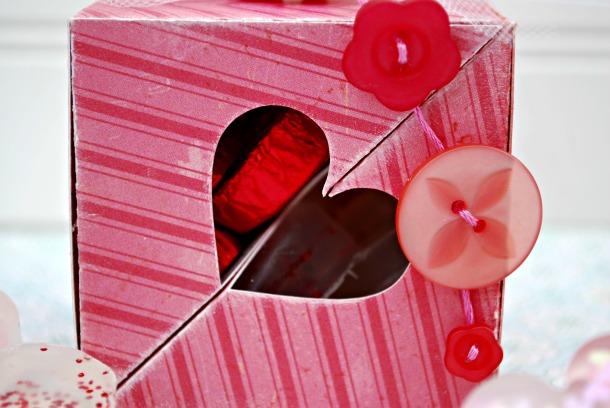
Using some buttons from Close to my Heart I added door knobs and added pre-made roses from the Recollections collection that were on clearance! LOVE!

For the front sentiment, I used a standard cut that came with my Silhouette Cameo software and tweaked and sized it to my liking. The font was French Script!  I used the same cut (flipped vertically and increased size) and font for the party details for the insert.  I inked edges with stamp ink.

PicMonkey Collagesw

It was a super fun project to plan and execute.  She has shared some of the party decor she has been making and I managed to coaxed her into sharing her A-M-A-Z-I-N-G wooden doll house neighborhood she crafted along with this post! She is crazy talented and I am thrilled we get to share the same blog space!  What is funny is that neither of us really saw our projects while making them and look how well they pair with each other! I guess that is the result of being old friends.

a cute shot my friend did before she sent them out. I love this idea!

a cute shot my friend did before she sent them out. I love this idea!

2013-03-22 11.31.36

Don’t you just {love}!

2013-03-22 11.35.53Thanks for sharing a piece of lovin’ what you do with cherished friends” pie with me.

A Lovely Blog Hop Filled with Good Clean Fun & Blog Candy!!!

download
Happy Saturday!  Welcome to the A Lovely Blog Hop, hosted by the sweet and ever lovely Jill from Every Day is an Occasion!  I am so thrilled to be hopping along with these fabulously talented ladies and I hope you will hop along to see some of the A-M-A-Z-I-N-G Valentine inspired projects!  If you just joined us, please click HERE to start from the beginning   If you came from Kelsie Ann from Cut Craft Create, you are in the right place!
What I have cookn’ for you today is a two part project! The first part is a super easy and clean way to express your Valentine cheer . . .  Homemade soap!  If I knew it was this easy, I would have been doing this for years! I actually had the kiddos help in making a few batches. The second is a super sweet and simple two piece box cut from Samantha Walker’s stash of amazing Silhouette designs.
SWVbox1
swpix1
Now before you check out the tutorials below and hop on over to Court from Court’s Craft Corner, up for grabs is some fun blog candy!

To win you need to:

  1. Leave a comment
  2. Are subscribed to this blog
  3. and LIKE my Facebook Page
I will be announcing the randomly picked winner via my blog and Facebook page 2/14/2013!  Who does not love WASHI TAPE?  These four amazing designs are from Paper Issue’s Esty store and could be yours! 
blog candy
Hot Pink Quatrefoil Washi Tape
Yellow Chevron Washi Tape
Grey and White Polka Dot Washi Tape
Are Those Aqua Birds on That Wire Washi Tape


Now on to the tutorials!

For the soap:  I found the 2 lb scored clear glycerin soap brick on Ebay. It is made in the USA.  It was around $7, but shipping was about the same.  YIKES!  However, a little goes a long way, so you get your money’s worth.  I found a how-to example on Pinterest, but  I decided to document how I did this, since I was using different tools.

swpix3
First I cut up the glycerin soap only using two scored rows and chopped coarsely (the original tutorial said it breaks apart easily with your hands, that was so not the case with my brick. That stuff was hard as a rock!).  I found that two rows makes one batch using my mold.  I then added the chopped pieces to a glass measuring cup and microwaved it to melt it down in 3-4 ten second intervals stirring it each time (you really need to babysit this part, but what is 40 seconds of babysitting?).
swpix4
I then pulled out my silicone heart mold I found at IKEA for $1 and poured the melted soap into the mold at a little under a half.  I then added Recollections Berry Red Course Glitter for one batch and then some $ Bin find heart shaped glitter for the second batch.  You need to move quickly, because it sets up fast.  Once glitter was added, I then allowed for it to harden just for about a minute and then topped off each heart with the melted glycerin.
swpix5
It takes about 15 minutes to completely set.  All you do  is pop them out of the mold and they are done!  Easy peasy!
swpix7
For the box:  You can find the Pair of Hearts cut over at Silhoutte, click HERE!   It imports to your screen with both boxes fitting on one 12×12 piece of card stock (I used the stock size that it was imported in and was super happy with the size- it was nice not to have to mess with re-sizing for a quick project).  When doing a test cut I found that I needed to make sure to use a thicker design paper due to needing more structure; I used Crate Paper, Little Bo Peep.  I placed the side of the paper I wanted to see on the outside of the box facing up.  I did do “multi-cut”.  Once cut, I folded the box, using a bone folder. I then inked the edges with Close To My Heart White Daisy stamp ink.
box1
 I then formed the box and glued the two flaps to secure it.
box2
Once glue dried, I  filled the boxes and closed them up (one box held 5 pieces of Bliss chocolates and one box held 4 heart soaps.)  I then attached the boxes together.
box3
Once boxes were assembled, filled and attached, I cut a piece of white tulle that was about 2.5 inches x 12 inches. I then wrapped that around the box and tied a bow at the top.  I then made a button chain using Close to My Heart Red Assortment buttons and Close to My Heart Bubblegum Embroidery Floss using the below technique.
box4
I then tied the button chain to the center of the bow and then wrapped Close To My Heart Cotton Candy Designer Ribbon around the middle of the bow to hide the embroidery floss.
swval2
I then attached the button on the button chain to the box for more security with Glue Dot minis.
swval3
There you have it! A sweet and chic Valentine treat!
swpix1
Thanks for sharing a piece of “wishing you a very sweet and squeaky clean Valentine’s Day” pie with me and be sure to head over to see what sweet, and I do honestly do mean sweet (I have had the honor to meet her) Courtney, from Courts Crafts Corner has to share! 

If you lost track of the hop, you can refer to the below 🙂

Linking up to: