Today is my first blog post as a Globecraft and Piccolo design team member! I have this post and a post up over on the Globecraft and Piccolo blog happening today! I sure have been a very busy girl, but I have had a blast working with these product lines! Their products for embossing and glittering are out of the world amazing! I am serious! I have worked with my fair share of product in this arena and I quit using a lot of it, because I thought it was me not being able to master technique or the product. Well I am thrilled to say it is NOT me!
There is a total difference in efficiency, hardly any waste, goes on even, sets amazingly well. AND the Glitter! Oh my goodness I have never seen anything like it and does it really cling to their glaze/adhesive, called Glastique Matte.
So here is what I had cookin’ with some of these amazing products . . . yes another yarn wreath! OK, I must admit I love making these and this will probably not be the last one you will see.

Materials Needed:
- G&P Enamel/Embossing Powder Adhesive
- G&P Glastique Matte Powder
- G&P Napthol Red 3D Enamel Gell
- G&P Pure Sparkle Silver Glitter
- G&P Siam Silver Embossing Powder
- 14 inch foam ring/wreath – Michael’s
- Yarn – Michael’s
- Straight Pins – Jo-Anns
- Metal snowflakes – recycled Christmas garland
- Ribbon – Celebrate it (both kinds) – Michael’s
- Bling -Michael’s
- Letter – Michael’s
- Hot glue gun
Making the Wreath:
How I made the wreath was very simple . . . almost relaxing. What you do is get a foam ring from your local craft store. This one happens to be 14 inches in size. I picked up some “woolly yarn” and some straight pins as well.
Tie a knot at the end of the yarn and push a pin through the knot on the backside of the wreath. Begin to wrap the yarn over and around the wreath covering the tail of the yarn. When ending one color and going on to the next, tie a knot on the ending color and push a pin through it to secure on the backside of the wreath towards the middle. Then start the steps over with the new color.

Pretty simple huh? This wreath took about an hour and a half to wrap, but I was watching TV, so my focus was not solely on the wreath.

Making the Snowflake Embellishments:
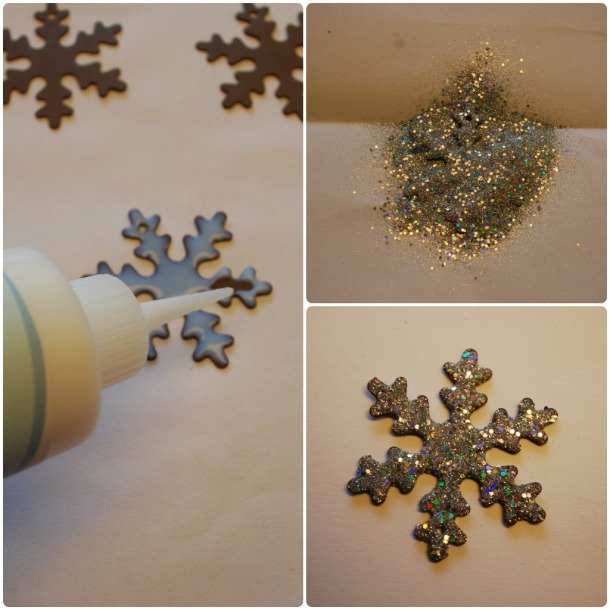
These are metal snowflakes I pulled off of an old garland, you could use paper, chipboard, wood…etc. Applying Glastique Matte cover the embellishment and dust with Piccolo Pure Sparkle Glitter and shake off the excess. Allow to set and dry and repeat on opposite side.
Making Letter Embellishment:
Using a MDF letter found at a local craft store, apply Piccolo Enamel/Embossing Powder Adhesive to the outer edges of the letter with a small brush or Q-tip. Dust outer edges with Piccolo Siam Silver Enamel Powder. It does not need to have full coverage, just enough to cover most of it since it will be painted over with another Piccolo product. Heat and set with heat gun.
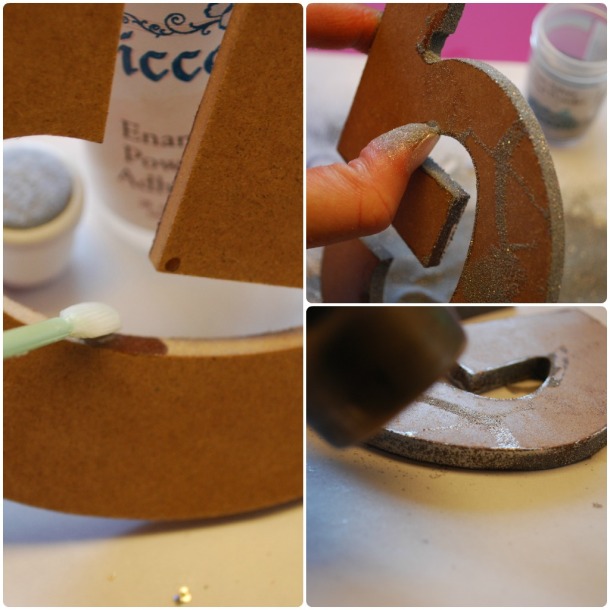
Next you will apply Piccolo Enamel/Embossing Powder Adhesive to the front of the letter and dust with Piccolo Siam Silver Enamel Powder. Shake off the excess and set with a heat gun.

Now apply Piccolo Napthol Red 3-D Enamel Gel to all the edges of letter. Set aside to allow to set and dry. This will take a little over a hour.

Once letter is dry, tie a ribbon around the letter and add an embellishment to the bow using hot glue and set aside. Then wrap and tie pom-pom ribbon around each ends of the wreath and attach embellishments to it using wax twine. Then place letter on the wreath by adhering it with hot glue.
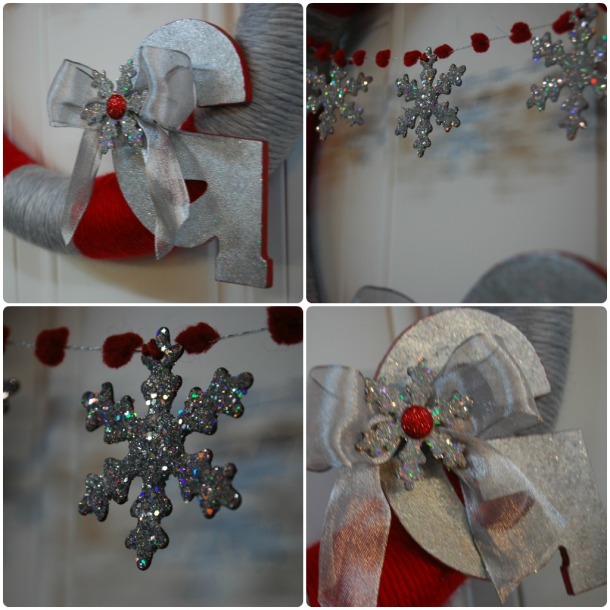
There it is a work well done with some serious added sparkle. This wreath would be an excellent replacement for your Christmas wreath come January.

Be sure to pop on over and check out my other project over at the Globecraft and Piccolo’s blog today! Maybe even check out their shop and see about adding some of these amazing products to your craft stash!
Thanks for sharing a piece of “Tinkerbell has nothin’ on me now when it comes to fairy dusting” pie with me.
Linking Up To:
Everyday is an Occasion: Linking Party


