RSS Feed

Monthly Archives: December 2012

Fantabulous Cricut Challenge “Get Organized Cricut Crawl!” and BLOG CANDY!

Yay!  Welcome to Fantabulous Cricut’s “Get Organized Cricut Crawl”!  If you came from Brianna ‘s fun project, then you are in the right place!  If you have just joined me, this fun challenge crawl starts HERE !  There are fun blog candy along the way and a fun challenge prize sponsored by FCCB!

Here’s how the Crawl will work

 1. The crawl will begin at FCCB. Participants will visit each Design Team member’s blog to view their FANTABULOUS projects. Participants may follow the provided links at each blog.  If you get lost along the way, you can always return to FCCB to follow the links to our Design Team members’ blogs.
2. There will be prizes along the way at some of the Design Team blogs, so be sure to check out the goodies up for grabs! *You must meet the Design Team members’ stated criteria to be eligible for the individual prizes. Please see each DT member’s blog for details and directions.*
3. There will also be one GRAND PRIZE at FCCB!! That prize will be awarded to a participant that meets the challenge criteria and posts a link to their project below, drawn randomly by Random.org. Just like every other Challenge Me Monday.

NOW FOR MY PROJECT AND BLOG CANDY! 

In just a few hours we will be watching the ball drop and saying goodbye to 2012 and hello to 2013!  One of my New Year’s resolutions is REALLY get organized!  I am a organized person, but with a busy schedule of having a three and four year old and as my crafty blog hobby grows, I find that time is NO longer on my side and refining some of my organization IS A MUST!

fccb
I since I am now on multiple design teams I really need to keep track of my deadlines.  The system of using my Iphone calendar was working, but just was not feeling right. I tend to be old school with calendars and my schedules, I need to be able to physically write it down and see everything at one glance.  I found this planner calendar in the Target $ bin and decided this would be perfect!  It is portable,  yet big enough for notes and to see it at one glance.
DSC_5386
Using paper from a Recollections stack, I covered the planner using an ATG, added some ric-rack, ribbon, and buttons. I inked the edges with Holiday Red from Close to My Heart and used Glue Dots to attach the ribbon and button (the curly ribbon was wrapped around a 1/4 inch dowels using clothespins to fasten each ribbon end and was baked at 200 degrees for 20 minutes).  Using Cricut Craft Room, I cut some vinyl out from Expressionsvinyl.com using the Storybook font. Then I added it to the planner using transfer tape.  The colors of the planner match my craft room and I am thrilled I am starting out the New Year already getting a handle on organizing my busy life.

 THE BLOG CANDY!  

blogcandy

As many of you know I am a designer for the fantastic manufacture GLOBECRAFT & PICCOLO.  I LOVE their products and one of my favorite products to work with is their sparkle glitter coupled with their adhesive/finishing glaze Glastique that rivals Mod Podge.  What is up for grabs is a bundle set of the Pure Sparkle Silver Glitter, 1 oz. Glastique Matte  and a pretty vintage book board images!  All you have to do is be a  follower of my blog,  leave a comment and LIKE me HERE on Facebook!  Winners will be announced on Friday! Please be sure I have a way to contact you or your prize will be up for grabs to another lucky crawler! 
Thanks for sharing a piece of “getting organized with some fun bling for free” pie with me!

Now Let’s Get Back To Crawling Along!

Here’s the Line Up

Missy – http://www.quickchickdesigns.blogspot.com
Tammy – http://thepurplemuse.blogspot.com
Connie – http://www.conniecancrop.blogspot.com 
Jamie – http://scrapqueen141.blogspot.com
Brianna – http://www.Bloeffelbein.blogspot.com
Arin – http://apieceoflifespie.com (YOU ARE HERE)
Cicily – http://pinkdalmationscrapper.blogspot.com  NEXT UP!  
Cyndy –  http://arcyscraps.blogspot.com
Diana –  http://daisylovecreations.blogspot.com 
Nikki – http://craftycalamities.blogspot.com
Susie – http://www.susiecrafthappy.com
Janea – http://www.recollectionalley.blogspot.com

The Snowflake Project

DSC_5380

Happy Day After Christmas! I hope you all are enjoying the bliss of the holiday after-glow!   It has been a whirl wind, but I loved watching my kids in the magic of it all!

Today I am going to share a project I made for a project  for the decorations for the new Sandy Hook Elementary School.  The goal is to get crafters to make snowflakes and mail it to them so they can use it for the Winter Wonderland theme they are going to use.  Click HERE for all the details.

I found a simple Silhouette image and cut it out at around 5 inches on chipboard.  I then punched a hole at the top of one point with my Crop-A-Dial.  After that I applied Glastique Matte and then dusted with Piccolo Pure Sparkle Silver Glitter. I shook off the excess and repeated on the opposite side once dry.

DSC_5322

DSC_5323

DSC_5325

DSC_5326

DSC_5333

I ran some ribbon through the hole and packaged it up and sent it out to be part of the many that will hang to greet the students that endured so much just two weeks ago.  My prayers are with them, their families, the community and those that were directly effected by the tragedy.

To check out more about the glitter used in this project, please head over to Globecraft & Piccolo’s blog to see my product highlight.

Thanks for sharing a piece of “there is no snowflake alike” pie with me.

Happy Dance Time!

Samantha Walker

So last night I was standing in line at my local Trader Joe’s and I checked my Facebook and saw a “congratulations” on my timeline!  It was my time to check out so I had to wait to get home to see what that was all about and I that is when I found out I am a new proud member for the Samantha Walker 2013 Guest Designer Team!

I can’t wait to roll up my sleeves and start on some fun projects under the banner of Samantha Walker!

Thanks for sharing a piece of “allowing me to do a little happy dance” pie with me!

Hot Coco Warms the Heart…

Cococones

Oh my is it already Wednesday?  I can’t believe how fast this week is flying by and it does not help that I spent half of today in Dr. offices thanks to the whole family having a strep epidemic hit us and a unexpected foreign object (one of my flower crafting eyelets) in my 4 year old’s ear.  I guess she found it on the floor in my craft room and tried to attach it to her ear like an earring and it, “fell into my ear and disappeared”.  Thankfully it was removed safety and we are glad we paid the doc a visit for our strep epidemic or we would have never knew about her ear without the routine check for symptoms.

Now onto my fun project using Globecraft and Piccolo products and making my annual coco cones!  I used this tutorial from My Pink Stamper as my base for the coco cones, but I added dark chocolate chips, milk chocolate chips, white chocolate chip and a mixture of both peppermint and regular mini marshmallows.

For my tags, I recycled a metal garland I had by striping down the snowmen form it.  I then stamped an image on the snowmen with Close to My Heart – Everyday Life stamp set and the ink I used is My Pink Stamper’s Darkest Night.

coco cones 2

Once stamp has set and dried I then took Piccolo Turquoise 3-D Enamel Gel and applied it to the stamped stripes.  Set aside to set and dry.   For the candy cane striped snowman, I used Piccolo Napthol Red 3-D Enamel Gel and Titanium White 3-D Enamel Gel.  Make sure you let the first color (napthol red) set up first and then add the second color (titanium white).  This will limit any color running.

coco cones 4

For this snowman, I decided to emboss it.  I used a stamp from the same stamp set from Close to My Heat I used above.  Since chevron strips are really popular right now, I thought making a hip snowman was in order.  Using Enamel Powder Adhesive I ran it over the stamp and stamped the metal. I then dusted the snowman with Piccolo Siam Silver Enamel Powder and shook off the excess.  I then set it with a heat gun.

cococone Collage

There you have it.  Such an easy way to add some holiday festive cheer to some coco goodness.  I am also going to use some of these snowmen as gift tags for my Christmas gifts!   Take a moment and head over to Globecraft and Piccolo’s blog and check out my first product tip of the day!

Cococones

Thanks for sharing a piece of  “crafting eyelets do not make good earrings for a 4 year old” pie with me.

A Fun and Festive Yarn Wreath using Globecraft & Piccolo Products!

GnP-Design-Team-Logo-175

Today is my first blog post as a Globecraft and Piccolo design team member!  I have this post and a post up over on the Globecraft and Piccolo blog happening today!  I sure have been a very busy girl, but I have had a blast working with these product lines!  Their products for embossing and glittering are out of the world amazing!  I am serious!  I have worked with my fair share of product in this arena and I quit using a lot of it, because I thought it was me not being able to master technique or the product.  Well I am thrilled to say it is NOT me!

There is a  total difference  in efficiency, hardly any waste, goes on even, sets amazingly well.  AND the Glitter! Oh my goodness I have never seen anything like it and does it really cling to their glaze/adhesive, called Glastique Matte.

So here is what I had cookin’ with some of these amazing products . . . yes another yarn wreath!  OK, I must admit I love making these and this will probably not be the last one you will see.

DSC_5300

Materials Needed:

  • G&P Enamel/Embossing Powder Adhesive
  • G&P Glastique Matte Powder
  • G&P Napthol Red 3D Enamel Gell
  • G&P Pure Sparkle Silver Glitter
  • G&P Siam Silver Embossing Powder
  • 14 inch foam ring/wreath – Michael’s
  • Yarn – Michael’s
  • Straight Pins – Jo-Anns
  • Metal snowflakes – recycled Christmas garland
  • Ribbon – Celebrate it (both kinds) – Michael’s
  • Bling  -Michael’s
  • Letter – Michael’s
  • Hot glue gun

Making the Wreath:

How I made the wreath was very simple . . . almost relaxing.  What you do is get a foam ring from your local craft store. This one happens to be 14 inches in size.  I picked up some “woolly yarn” and some straight pins as well.

Tie a knot at the end of the yarn and push a pin through the knot on the backside of the wreath.  Begin  to wrap the yarn over and around the wreath covering the tail of the yarn.  When ending one color and going on to the next, tie a knot on the ending color and push a pin through it to secure on the backside of the wreath towards the middle.  Then start the steps over with the new color.

PicMonkey Collage1

Pretty simple huh?   This wreath took about an hour and a half to wrap, but I was watching TV, so my focus was not solely on the wreath.

DSC_5229

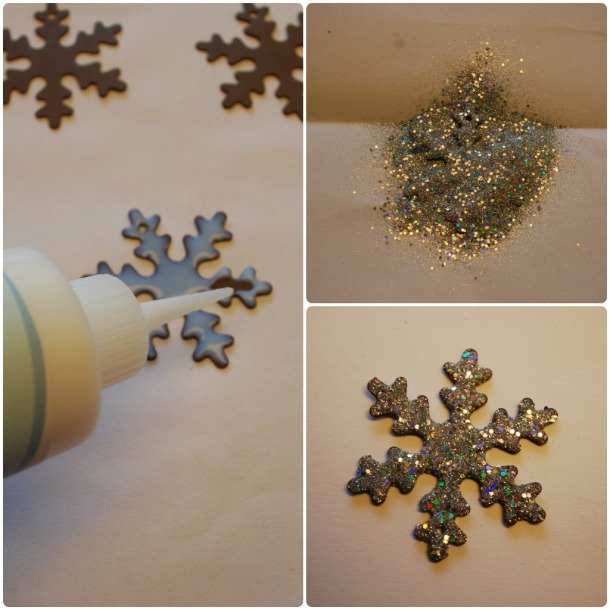
Making the Snowflake Embellishments:

These are metal snowflakes I pulled off of an old garland, you could use paper, chipboard, wood…etc.  Applying  Glastique Matte cover the embellishment and dust with Piccolo Pure Sparkle Glitter  and shake off the excess.  Allow to set and dry and repeat on opposite side.

PicMonkey Collage2

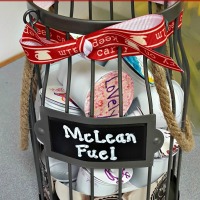
Making Letter Embellishment: 

Using a MDF letter found at a local craft store, apply Piccolo Enamel/Embossing Powder Adhesive to the outer edges of the letter with a small brush or Q-tip.  Dust outer edges with Piccolo Siam Silver Enamel Powder.  It does not need to have full coverage, just enough to cover most of it since it will be painted over with another Piccolo product.   Heat and set with heat gun.

PicMonkey Collage3

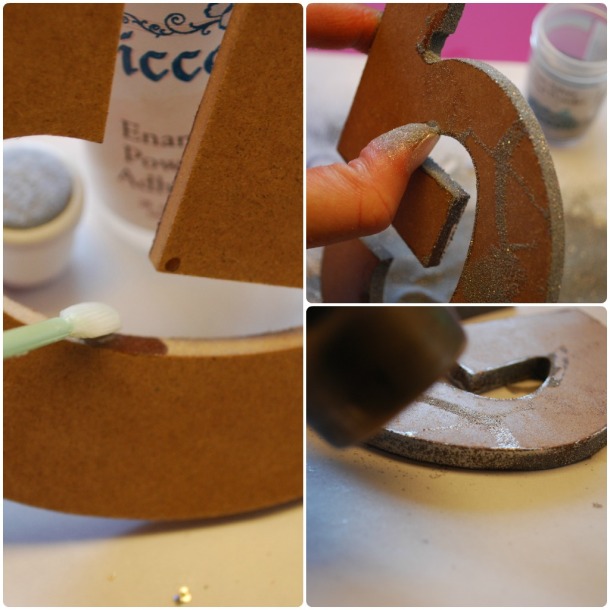
Next you will apply Piccolo Enamel/Embossing Powder Adhesive to the front of the letter and dust with  Piccolo Siam Silver Enamel Powder. Shake off the excess and set with a heat gun.

PicMonkey Collage4

Now apply Piccolo Napthol Red 3-D Enamel Gel to all the edges of letter.  Set aside to allow to set and dry.  This will take a little over a hour.

DSC_5240

Once letter is dry, tie a ribbon around the letter and add an embellishment to the bow  using hot glue and set aside.  Then wrap and tie pom-pom ribbon around each ends of the wreath and attach embellishments to it using wax twine.  Then place letter on the wreath by adhering it with hot glue.

PicMonkey Collage5

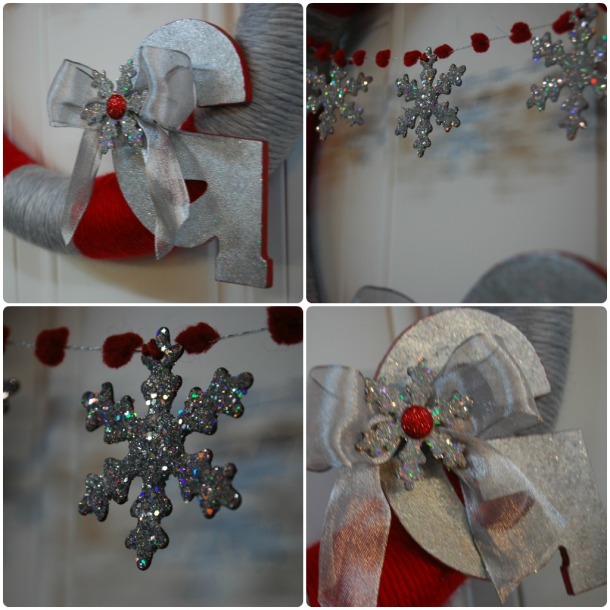
There it is a work well done with some serious added sparkle.  This wreath would be an excellent replacement for your Christmas wreath come January.

DSC_5300

Be sure to pop on over and check out my other project over at the Globecraft and Piccolo’s blog today!  Maybe even check out their shop and see about adding some of these amazing products to your craft stash!

Thanks for sharing a piece of “Tinkerbell has nothin’ on me now when it comes to fairy dusting” pie with me.

Linking Up To:

Everyday is an Occasion: Linking Party

I Gotta Create

Pink Cricut – Link Up Tuesday


Thoughts and Tons of Prayers . . .

Thoughts and tons of prayers for those families who lost so much today.  When an elderly person passes, they take the history with them.  When a child passes, they take our future.   Today, we as a nation, were robbed from our future and the future of these bright souls.  images


Ring of the Bells – Gift Card Style!

DSC_5055

Hello and happy Monday to you!   Today we are having a fun challenge over at Fantabulous Cricut Challenge Blog with the theme being Bells are Ringing!  Head over and check out what the designers have in store for you in ideas for making some great Christmas themed projects with a little ring to it!  Make sure if you decide to link up, that you have at least some sort of bell and ONE Cricut cut added to your project!

DSC_5051

What I decided to do, is make a gift card holder that poses as an ornament in the shape of a bell using my Gingerbread cartridge.   I cut chipboard at 4 inches and then using a Doodlebug- North Pole designer paper, I cut the same image, two more times (I did not need to use the “flip” feature since I was using double-sided designer paper, but you would need to “flip” the image for the back of the bell if only one-sided paper is being used).

DSC_5048

I then cut two more images using the outline layer on a thick grey card stock from Papertreyink.com and embossed it using Globecraft and Piccolo Enamel/Embossing Powder Adhesive and Siam Silver Embossing Powder.

DSC_5053

I wrapped some waxed twine around the bell and hot glued it to clean up the edges of the bell. Once all the pieces were glued together (back sheet glue only around the edges), I then punched a hole at the top of the bell using my Crop-a-Dile.  I then used an exact- o- knife and made a slit along the backside of the bell to create at “pocket” where the gift card would be placed.

DSC_5057

I added the poinsettia embellishment brad and more waxed twine for the hanger.

It was a super quick and fun project that will make gift giving really fun this year.  Now be sure to head on over to Fabtabulous Cricut and check out the fun projects and LINK up!

Thanks for sharing a piece of “some creative gift giving” pie with me!

Exciting News!

GnP-Design-Team-Logo-175

So I can finally let the cat out of the bag and let you all know that I have the honor to be a part of an amazing design team for Globecraft & Piccolo products!  This is my very first manufacturing design team experience and I am a bit nervous and excited at the same time.  The talent I share the platform with is an amazing group of designers and I am thrilled to be given this amazing opportunity!

I am excited because this term is focusing more on home decor!  Yay!  So up my alley! I have a few things cookin’ in the craft room that will be out soon that I can’t wait to share with you all.   I have to say, their products are TOP NOTCH.  The embossing powders are just divine – the best I have ever worked with!

Head over and meet my fellow designers , check out the blog and online shop!

Thanks for sharing a piece of “exciting news that involves putting my heat gun to work” pie with me!

Handmade Winter Gift Exchange!

handmade-gift-exchange-june-12

I decided to participate in the Craftaholics Anonymous Winter gift exchange.  This is were you sign up on Elfster and then you get paired up with another crafter to make a gift for each other.  I have not yet received my gift from my pair, but will share it with you all when I get it.  I sent my project to her last Friday, so I am pretty sure it is safe to link up my project back over to Craftaholics Anonymous.

I decided to make another yarn wreath . . . Shocking!  I love making these and believe it or not, I am making another one right now.  They are a bit time consuming, but I find them relaxing to make. This is probably the closest thing to knitting or crochet I will ever get. 🙂  My match-up lives in Orlando and works for Walt Disney World.  Her profile picture was her with Mickey, so I thought it was safe to say, she is a bit of a Disney nut.

DSC_4923

For the wreath, I used a 12 inch round foam wreath and wrapped it with red, black and white yarn. I cut the image using this tutorial as a guide from my Silhouette.  This machine rocks and it was so easy to take an image from Google Images and make the images.  I cut them on a thick piece of  black card stock from Papertreyink and chipboard for a solid structure.   Once I glued together the black card stock to the chipboard, I glittered the top of the image.

DSC_4914

DSC_4920

I made ribbon flower using a zip tie to hold it together and then hot glued it to the yarn wreath I made.  I added different sized buttons to make Mickey head and ears.

DSC_4916

DSC_4921

I think this turned out super cute and I hope that she loves it!   Head over and see all the other fun projects LINKED up that someone made for a complete stranger – there is a lot of crafty love going on over there!

Thanks for sharing a piece of “crafting for the sheer joy of giving” pie with me.

My First EVER Advent Calendar!

DSC_5037As a little girl I always wanted to have a real advent calendar, sure I got the ones that you get at the grocery store with the chocolates in each day, but I loved the idea of having something special in a little box that would be a surprise each day.   Well, I finally have one!  I have filled it with chocolates and little Christmas themed activities to do with my girls.  I had fun coming up with ideas and the girls are going to have fun this season finding the number for the day and finding out what fun thing they can do that day.  I feel it is really going to keep the magic alive that comes with Christmas and small children.

I took a class at my local Scrapbooking store in a support of design team member I worked with.  I am not a “crafty class” type of person. The hubs has helped establish an amazing craft room and the thought of packing up my stuff and heading off to a crop or a class goes against my grain of being a crafting hermit.  However, I had a blast taking the class, being among like-minded people and learning new approaches and techniques.  Also a little harmless celebrity gossip and scandal swapping makes craft time grand! 🙂 – Hey, I do live 45 minutes from Hollywood on a good traffic day. 🙂

DSC_5042

The tree is a MDF cutout from a Kaiser Craft kit.  It was not rocket science putting the kit together, once again another more time and patience than “developed skill” to do to this project.  You need to paint the cutouts with craft paint and let dry, sand down any rough edges, glue boxes together (you need rubber bands to hold together boxes until the glue dries).  Cut paper to the shapes needed for the tree and boxes. Glue paper to boxes and tree.  Build form and glue down (that could use a second person to help with this step and I was glad I had a partner). Embellish and add your goodies to the boxes.  I used Kaiser Craft stickers for the numbering, gemstones and generic buttons I got over at Michael’s.   I also inked the boxes and the edges of the tree with Chocolate from Close to My Heart.  The paper was from Kaiser Craft and Doodlebug.

DSC_5043

DSC_5045

It was a fun project to fill a Saturday afternoon and support a fellow crafty blogging buddy.  The best part is I finally have my Advent Calendar!

Thanks for sharing a piece of “getting out of my craft room hermit shell” pie with me.

Linking Up To: 

Gotta Create – Wildly Original Link Party! 

Craft-O-Maniac

Everyday is an Occasion

Paper Playtime

Pink Cricut – Link Up Tuesday