RSS Feed

Tag Archives: home

DIY Doll Wardrobe

Check out the video to see an up close and personal tour of these fun filled doll wardrobe.

Happy Sunday All!  I can’t believe NEXT Sunday will be Easter! Wow time is flying by and I guess it feels that way since I have been very busy in my craft room and in the hub’s workshop cookn’ up some fun playtime goodies for our two little girls.

ag

DSC_6101

A while ago we decided we needed to make something that would hold all the dolls and doll swag our little girls are starting to accumulate.  I wanted it to be interactive as well as organized storage.  The hubs and I sat down started to design a concept.  We came up with a design, made a blueprint and headed to the wood store.

DSC_6106

It has taken a few weekends to knock out these two pieces, but we had a blast doing it.  We still have a large drawer to make and that is soon to be in the mix of construction. DSC_6096

DSC_6110

I had a blast putting my Silhouette to work and cutting out vinyl and transferring it onto sections of these structures, spray painting and peeling off.  I found the cuts at the Silhouette store from Samantha Walker and Lori Whitlock.  DSC_6097


Thanks for sharing a piece of “love DIY” projects with the hubs!

Linking Up To:

Gotta Create – Wildly Original Linking Party

The Real Thing- Link Party
I Heart Naptime- Link Party

A Lovely Blog Hop Filled with Good Clean Fun & Blog Candy!!!

download
Happy Saturday!  Welcome to the A Lovely Blog Hop, hosted by the sweet and ever lovely Jill from Every Day is an Occasion!  I am so thrilled to be hopping along with these fabulously talented ladies and I hope you will hop along to see some of the A-M-A-Z-I-N-G Valentine inspired projects!  If you just joined us, please click HERE to start from the beginning   If you came from Kelsie Ann from Cut Craft Create, you are in the right place!
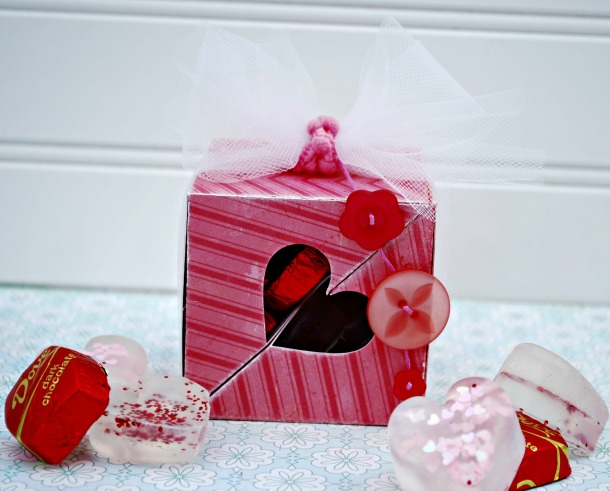
What I have cookn’ for you today is a two part project! The first part is a super easy and clean way to express your Valentine cheer . . .  Homemade soap!  If I knew it was this easy, I would have been doing this for years! I actually had the kiddos help in making a few batches. The second is a super sweet and simple two piece box cut from Samantha Walker’s stash of amazing Silhouette designs.
SWVbox1
swpix1
Now before you check out the tutorials below and hop on over to Court from Court’s Craft Corner, up for grabs is some fun blog candy!

To win you need to:

  1. Leave a comment
  2. Are subscribed to this blog
  3. and LIKE my Facebook Page
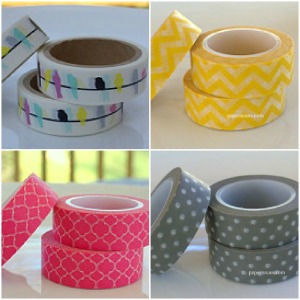
I will be announcing the randomly picked winner via my blog and Facebook page 2/14/2013!  Who does not love WASHI TAPE?  These four amazing designs are from Paper Issue’s Esty store and could be yours! 
blog candy
Hot Pink Quatrefoil Washi Tape
Yellow Chevron Washi Tape
Grey and White Polka Dot Washi Tape
Are Those Aqua Birds on That Wire Washi Tape


Now on to the tutorials!

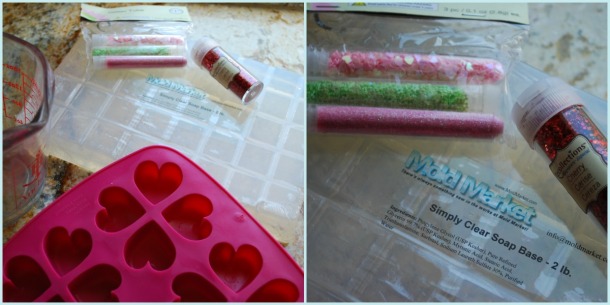
For the soap:  I found the 2 lb scored clear glycerin soap brick on Ebay. It is made in the USA.  It was around $7, but shipping was about the same.  YIKES!  However, a little goes a long way, so you get your money’s worth.  I found a how-to example on Pinterest, but  I decided to document how I did this, since I was using different tools.

swpix3
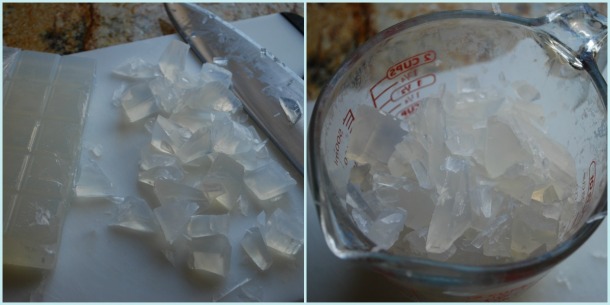
First I cut up the glycerin soap only using two scored rows and chopped coarsely (the original tutorial said it breaks apart easily with your hands, that was so not the case with my brick. That stuff was hard as a rock!).  I found that two rows makes one batch using my mold.  I then added the chopped pieces to a glass measuring cup and microwaved it to melt it down in 3-4 ten second intervals stirring it each time (you really need to babysit this part, but what is 40 seconds of babysitting?).
swpix4
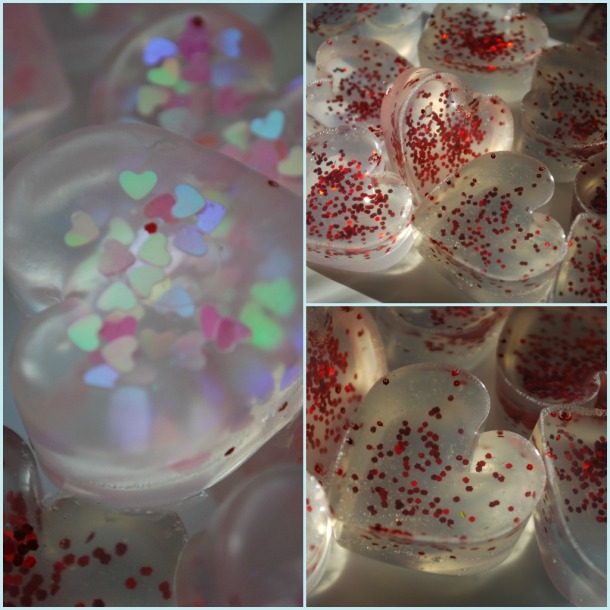
I then pulled out my silicone heart mold I found at IKEA for $1 and poured the melted soap into the mold at a little under a half.  I then added Recollections Berry Red Course Glitter for one batch and then some $ Bin find heart shaped glitter for the second batch.  You need to move quickly, because it sets up fast.  Once glitter was added, I then allowed for it to harden just for about a minute and then topped off each heart with the melted glycerin.
swpix5
It takes about 15 minutes to completely set.  All you do  is pop them out of the mold and they are done!  Easy peasy!
swpix7
For the box:  You can find the Pair of Hearts cut over at Silhoutte, click HERE!   It imports to your screen with both boxes fitting on one 12×12 piece of card stock (I used the stock size that it was imported in and was super happy with the size- it was nice not to have to mess with re-sizing for a quick project).  When doing a test cut I found that I needed to make sure to use a thicker design paper due to needing more structure; I used Crate Paper, Little Bo Peep.  I placed the side of the paper I wanted to see on the outside of the box facing up.  I did do “multi-cut”.  Once cut, I folded the box, using a bone folder. I then inked the edges with Close To My Heart White Daisy stamp ink.
box1
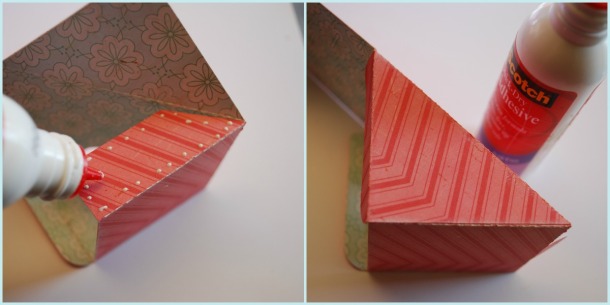
 I then formed the box and glued the two flaps to secure it.
box2
Once glue dried, I  filled the boxes and closed them up (one box held 5 pieces of Bliss chocolates and one box held 4 heart soaps.)  I then attached the boxes together.
box3
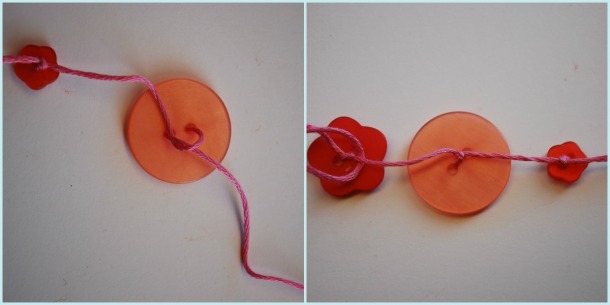
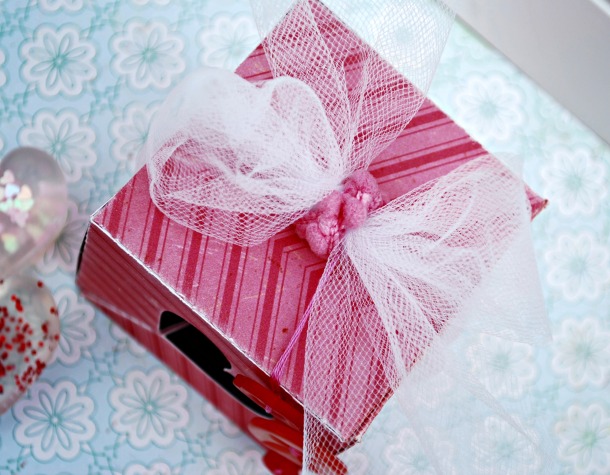
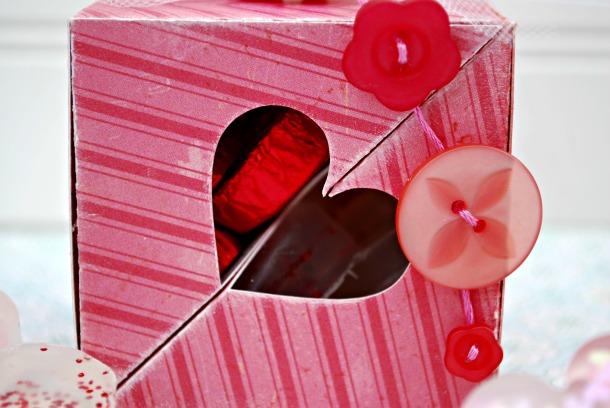
Once boxes were assembled, filled and attached, I cut a piece of white tulle that was about 2.5 inches x 12 inches. I then wrapped that around the box and tied a bow at the top.  I then made a button chain using Close to My Heart Red Assortment buttons and Close to My Heart Bubblegum Embroidery Floss using the below technique.
box4
I then tied the button chain to the center of the bow and then wrapped Close To My Heart Cotton Candy Designer Ribbon around the middle of the bow to hide the embroidery floss.
swval2
I then attached the button on the button chain to the box for more security with Glue Dot minis.
swval3
There you have it! A sweet and chic Valentine treat!
swpix1
Thanks for sharing a piece of “wishing you a very sweet and squeaky clean Valentine’s Day” pie with me and be sure to head over to see what sweet, and I do honestly do mean sweet (I have had the honor to meet her) Courtney, from Courts Crafts Corner has to share! 

If you lost track of the hop, you can refer to the below 🙂

Linking up to:

Quick, Cheap, Simple and NO SEW Pennants!

Happy Friday All!

As promised I am sharing the “how-to” on the pennants and stands for a sweet Valentine’s Day decor.  This is something you could knock out in a few hours and that includes the trip get the goods!  This project cost around $10 to make.  A perfect project for this weekend! You could also whip one out for St. Patrick’s Day or even Easter!

tut 3

Step 1: First I found the “stands” at Home Depot.  They are table legs. The do have screws at the bottom, so use a pair of pliers and twist it out (remember righty tighty, lefty loosey 🙂 )  I first applied two coats of Gesso Primer paint (you can use just plain white craft paint instead if you don’t have it on hand)  I then LIGHTLY sanded down the rough and uneven painted areas.  I then started to build my paint layers using pink and red, making sure each color was dry before applying the next (make sure each just apply the colored layers in a random and spotty way, you are going for a rustic feel).  For the top coat of white, I applied two coats to completely cover the table stand.  Once dried, I then hand sanded each table stand to expose the color coats in random rustic pattern.

tut1

Step 2: I had the fabric store cut four different fabric patterns at 1/4 of a yard.  I then ironed each piece of fabric.  Be sure to fold in half with the back exposed and iron flat.  I then cut a 5 inch pennant from Cricut Cartridge Celebrations, using the “foundation pennant” on plain white card stock.  You can just as easily make your own stencil free hand as well.   I then placed the stencil at the top of the fold and traced it using a colored pencil.  Once all four fabric pieces are traced, cut and lay out flat. To fasten the two pieces of the pennant together, you can either use hot glue or heavy duty double sided tape.  I used double sided tape (be sure to really press down the tape before pulling off the top strip).  BE SURE TO LEAVE A LARGE ENOUGH GAP AT THE TOP OF PENNANT SO YOU CAN RUN A PIECE OF YARN THROUGH. Flip top over and adhear to the bottom.  String through and attach to each painted table leg

tut 2

Step 3: In making the hand crochet bows, make a 12 inch chain using three different colors of yarn cut at 24 inches each and tied together at the bottom.  Once chain is made, tie in a bow and attach a Glue Dot to the back of each bow and attach to the table leg (the reason I used a Glue Dot instead of hot glue is that the bows are removable and I can use the table legs for another themed pennant project (birthday party, Easter, etc.).  To see how to make the hand crochet chain, check out the included YouTube video I found!

tut 4

tut 3

Thanks for sharing a piece of “crafting cutness on a dime” pie with me!